Showing posts with label mittens. Show all posts

Wednesday, December 28, 2016

Pattern: Stripey Fingerless Mitts

Today a knitter asked me how many stitches I cast on for this project.  And I totally forgot about this pair of mitts I made 2 years ago.  I looked at my notes and realized I had most of the pattern written, even in different sizes.  

To make up for my slipping mojo of blogging since the election, I decided to post the pattern here.
Disclaimer, the pattern has not been test knitted, nor tech edited like I usually do.
Downloadable PDF link is provided below. 

I hope you all have a great 2017 ahead and stay warm for the winter.
My needles are busy, but I'm a bit lazy about taking photos lately.  I promise I will get back to blogging more. 


Stripey Fingerless Mitts


Sizes  Small (Medium, Large)
7 ½” (8”,  8 ½” ) around  x 12 ½” tall  / 19 (20.5, 21.5) cm around x 32 cm tall.
Yarn  Fingering Weight
Needles  US #2 / 2.75 mm  or change needle to obtain gauge
Gauge  28 stitches x 40 rows =  4” x 4” /  10 cm x 10 cm
Construction
  • ·         Knit mitten in round from cuff to fingers.
  • ·         Put thumb sts on waste yarn to be worked later.
  • ·         Continue to knit in round to fingers.
  • ·         Work thumb stitches in round.

Abbreviations
k  knit
p  purl
st(s)  stitch(es)
CO  Cast On
BO  Bind Off
rep  repeat
pm  place marker
sm  slip marker

Illustration Link
A photo illustraion showing the process of making thumb opening:


Stripey Fingerless Mitts

With yarn A, CO 52 (56, 60) sts, join in round and pm for beginning of round.
Next round: sm, [k1, p1] to end.
Repeat last round for 5 more rounds.

Join yarn B and k 2 rounds in yarn B.
K 2 rounds in yarn A.
Repeat last 4 rounds for 14 more times.
Cut yarn B, work with yarn A only from this point on.

K 32 rounds, lengthen or shorten here.

Next round, thumb opening:
Right mitten:  k1, k8 with a 15” / 38 cm scrap yarn, slip the 8 knitted sts in scrap yarn back to left needle, k the 8 sts again with original yarn, continue with original yarn and k to end of round.
Left mitten:  k17 (19, 21), k8 with a 15” / 38 cm scrap yarn, slip the 8 knitted sts in scrap yarn back to left needle, k the 8 sts again with original yarn, continue with original yarn and k to end of round.

K 19 rounds.
Next round, decrease:  [k11 (12, 13), k2tog] 4 times.  –  total 48 (52, 56) sts
Next round:  [k1, p1] to end.
Rep last round for 4 more rounds.
BO all sts in pattern.

Thumb
Pick up 8 stitches below the scrap yarn,  and pick up8 sts above the scrap yarn with second needle.
Pull out the scrap yarn.

Next round:
Right mitten:  begin at the stitches above the gap, k8, pick up and k 2 corner sts,  continue to k8 of the stitches below the gap, pick up and k 2 corner sts.  –  total 20 sts
Left Mitten:  begin at the stitches below the gap, k8, pick up and k 2 corner sts,  continue to k8 of the stitches above the gap, pick up and k 2 corner sts.  –  total 20 sts

K 9 more rounds.

Next round: [k1, p1] to end.
Rep last round for 4 more rounds.
BO all sts in pattern.

Weave in all ends.
Block the mittens to shape. 


Saturday, September 8, 2012

Contours Wristwarmers


First time I volunteered to test knit something.  It was not out of virtuous motive, I was totally lusting after the pattern when I first saw it.

Chris, aka Doodle on Ravelry made these beautiful Wristwarmers few weeks ago, and I really wanted a pair for myself.  After drooling over it for a while, last week I began post stalking her on Ravelry to see if she'd need testers. Sure enough, she posted the casting call this week for Contour Wristwarmers. I jumped on the chance even though I'd never test knitted before, and never wanted to until now. She was very sweet to let me do it.

I always knew when I make them it's going to be darker red to brighten up the wintry days. Initially I had Elann Baby Cashmere in mind, but decided to go with The Plucky Knitters Primo instead, glad I did.  The color is really gorgeous to show off the beautiful cables.

I can't say enough about how much I enjoyed knitting these and how clearly written the pattern was. I felt like a useless tester for not seeing any problem with the pattern. The cables were so addictive that I stayed up late at night to knit them.

Now I want more pairs of different colors to go with different clothes!


Friday, June 22, 2012

Ode to Bonnard


I am just beginning to understand what it is to paint.  A painter should have two lives, one in which is to learn, and one in which to practice his art. 
 -Pierre Bonnard


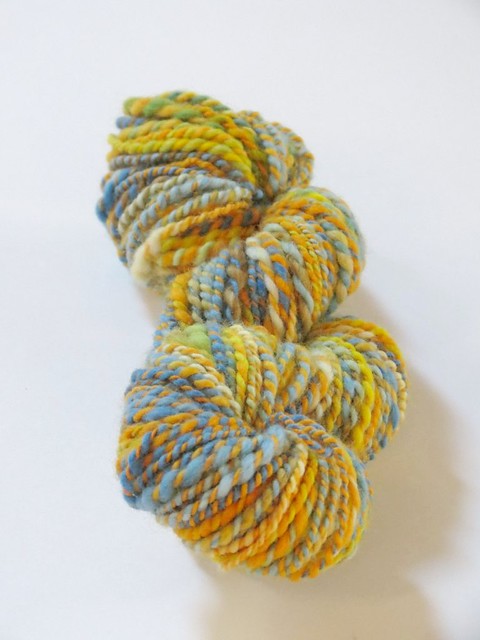
This time I do have some knitting to report.  I finished a hat and a pair of mittens from the same skein of yarn I spun.  The summer Music Festival Club of Two If by Hand came last month with the colorway Bumbershoot and it was 4 oz of Rambouillet. I began spinning using short backward draw and I was not enjoying it at all.  The staple was very short.  So I switched to long draw method. a very good move.  I immediately found the Rambouillet pleasant to spin, and the resulting yarn bloomed after wash, a lot.  It was very squishy, much more so than merino or BFL.  Love it.
The spinning was done over a week ago.

This week I began knitting a hat with the yarn.  A simple hat and a little cable design on the side.  The colorful palette demanded a simpler decoration.  It was slightly slouchy.    


After the hat came the mittens from the nearly half of the 380 yards of sport weight left.  They were just plain St st all the way.

While knitting the mittens I kept thinking how much the colors reminded me of one of my favorite painters, Bonnard's work,

The colors may be akin to some other artists' palatte as well, such as Diebenkorn, but up close it's more reminiscent of Bonnard because the brush work in spots of color rather than flat area of colors as a result of 2 strands plying. 

Diebenkorn's Ocean Park


Back when I was living in DC during grad school years, Phillips Collection was within walking distance from our apartment. After visiting many museums in the world, Phillips remained to be one of my most favorites. For a not overwhelmingly large museum, it housed a superb collection. Sometimes when visiting a collection composed mostly of third rate work by big names, like a bad Monet, or so-so Picasso, I'd get the sense that the collector was collecting by name rather than a profound appreciation. But at Phillips you could feel the collector's love of art and the depth of it. For example, I didn't care for Renoir at all, but the Renoir at Phillips made me re-evaluate my opinion of the artist, the Luncheon of the Boating Party.

Being a painter, I bow to the supreme use of color by Bonnard.  Both him and Matisse, in my world, are the 2 colorists of all time. His work may be seemingly charming but the use of color is absolutely experimental for his time.  His composition is more studied than its informal look impart with first impression.  

Pierre Bonnard - The Palm

The Palm at Phillips is really my favorite Bonnard that I'd seen in person.  It could be because I'd visited it so many times that it became personal to me. 

Then there is The Riviera,


My mittens made me think of these two paintings and that's a wonderful thing. 

Thursday, December 29, 2011

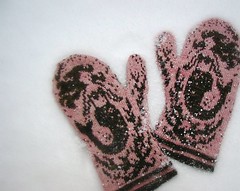
New Pattern - Mermaid Mittens

yarn: Madelinetosh Tosh Merino Lite, main color Rose, contrast color Twig
needles: US#1 for cuff, US #2 for rest of mittens                                                           

Well, not brand new pattern but it was published coupla weeks ago. It is now available through Ravelry.  I couldn't show it when I finished the mittens because the mittens were knitted for Christmas present.  Now that the present had been presented, here they are.

yarn: Madelinetosh Tosh Sport. color Wellwater, and Tart
needles: US #2 for cuff and #3 for rest of the mittens

Not many people know I actually have a weird phobia of fish.  I freaked out at the sight of fish, even a photo of it.  But my sister Judy loves mermaid, among other little girly stuff such as hello kitty, and believe it or not, she is already 38 years old.  So it's crazy that I actually made this design. I decided to make her a pair of mittens for Christmas.  No way am I going to make hello kitty, so I designed a mermaid mitten.


I first knitted a mitten with sport weight yarn.  I knew it really wasn't her color combo, then I tweaked the chart and made another design in fingering weight with colors I knew she'd like.  Then I came back to finish the second mitten of sport weight yarn.  I deicded to reverse the color on the second mitten of the sport weight just so I wouldn't be bored.

On the palm side i decided to do simple all over geometric motif that is easy to memorize.

The pattern now includes both versions, fingering weight and sport weight.

Monday, December 5, 2011

spin spin and more spin


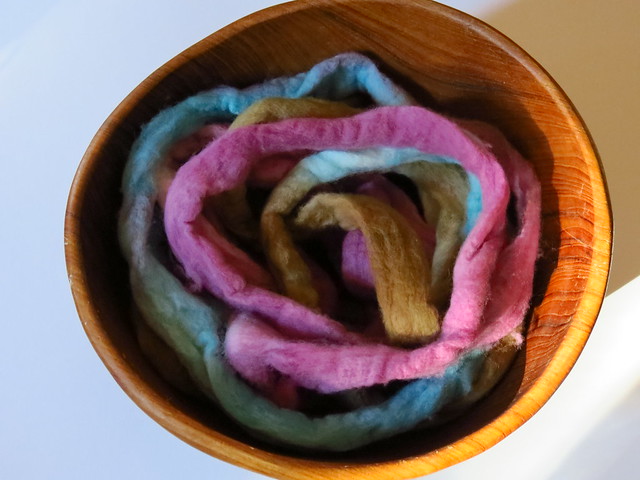
For the past two weeks, I'd been dyeing up fiber and spinning like a total addict.  I did manage to knit up a quick pair of fingerless mitts after the first batch of dyed fiber just because I was soooo curios how the dye job would look when knitted up.  I also ventured into spinning merino, it did take some getting used to, but I loved the luxurious fiber.  I'm definitely putting in a lot of practice time.


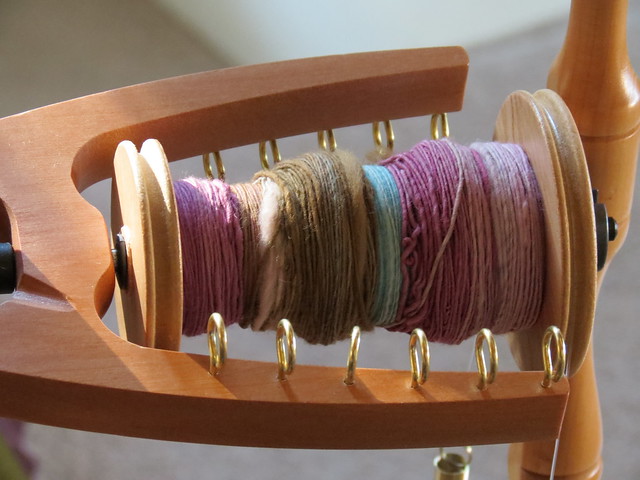
and this is what's on my spinning wheel now:


Saturday, November 19, 2011

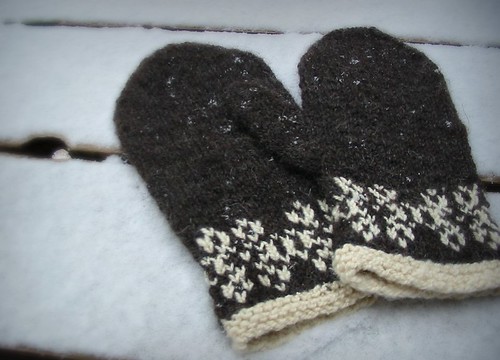
My Very First Handspun Mittens

After a week and half of spinning on my new spindle, I finally got enough yarn to make something.  I even plied the yarn.  But I wasn't sure how correct was my plying.  All I did was holding 2 strands and spun them in reverse, and voila, I had 2 ply yarns that weren't too balanced.

Main Color: Dark Brown Welsh
Contrast Color: Corridale 
(both purchased from Dharma Trading CO)
Needles: US #4
 
 I made a quick motif design that turned out to be a bit too diffused due to single stitches of contrast color in many places as opposed to concentrated consecutive stitches of contrast color. Also, the contrast color yarn was spun thinner than the brown so the stitches aren't as fulled as compare to the brown yarn.  But I'm still pleased with the result.  One mitten also came out wider than the other due to the yarn was thicker.  I guess some batch of yarn was spun thicker than the others.  Live and learn.


After 10 days of spinning, the designing took 40 minutes and the knitting took 2 days.  So the last part was definitely an instant gratification.


I raised a little money to fix up the old wheel by destashing  the few indie yarns in my stash.  They barely made a dent to my yarn collection in terms of quantitiy, but they sure were the most expensive ones in my collection, so that really helped.  Now I just need to learn more about spinning wheels to make better decisions regarding the missing parts for the old wheel.

I am really excited about this new addiction.   But I did miss knitting.  Not knitting for 10 days while spinning was starting to get to me.  I'm ready for new projects.


Monday, November 7, 2011

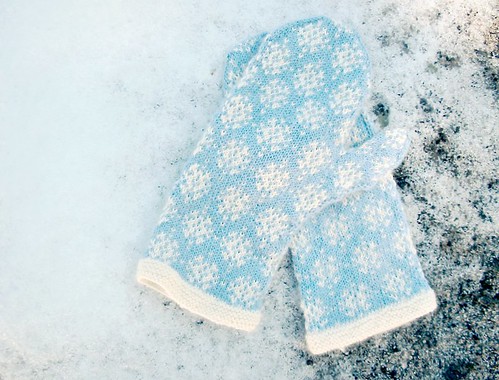
Pattern is now up - First Snow

We got our second shot of snow of the season this weekend,  perfect time to release the pattern.  First Snow Mittens is now available through Ravelry.


Sunday, October 31, 2010

Lost and Found


I've been playing with natural dye and having tons of fun lately.

It began during my trip to Istanbul.  I had a wonderful chat with a rug dealer at the Grand Bazaar.  He was not pushy to sell at all (all we ended up buying were the cheapest things in the shop - few pillow covers, the only thing we could afford.)  After the sale, he invited us to sit down for some tea. We talked about so many things, his trips to the U.S. and his favorite place was Montana, and the friendliness and easy attitudes of Americans that most people in other parts of the world don't see.  We talked about Orhan Pamuk's books.  We talked about Turkish culture, and Grand Bazaar.  And we talked about rugs and dyes.  He said, "but natural dyes are much better. Sure they fade over time, but the colors are so much more subtle and interesting.... "  We talked about cochinal bugs, etc.  Ever since then I'd been thinking about natural dyed yarn.

I'd actually never seen knitting yarn with natural dyes before except for the ones I did with turmeric which was soooo not lightfast.  I don't mind color fading over time and that is what natural dye does, but when color fades noticeably within 2 or 3 days, it was discouraging.  So on my last trip down to Bay Area, I stopped by A Verb for Keeping Warm Berkeley store.  It was a little jewel of shop.  I was immediately drawn by the color of the natural dye yarn they have in the store.  Though I had no money left to buy any yarn there, I thought to myself, I must try dyeing some yarn myself using natural dyes.  Few weeks later, I ordered some dye from Botanical Colors and some yarn, and began my dyeing frenzy.

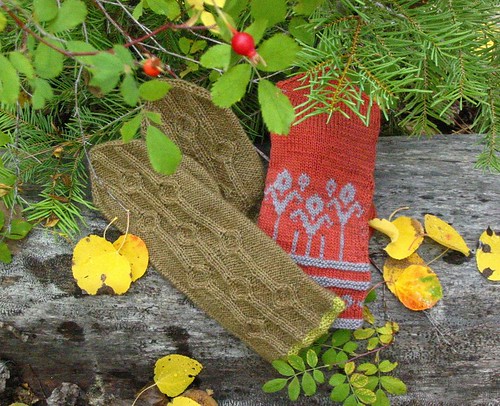
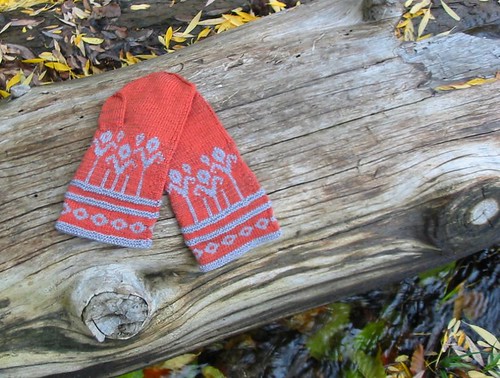
After much playing, I had a big load of yarn.   So I decided to at least knit coupla quick projects up to see how they look.  I made a pair of mittens for myself and a pair for Paul.  I really do love the way the colors came out.  I learned big way that different yarn takes dye so differently. Superwash yarn take up way more dye than non-superwash.  BF Leicester yarn (like the brown mittens) does not take up nearly as much dye, thus gives a more delicate coloring.


So I wrote down notes for the mittens.

Mittens 1 


Yarn: fingering weight. 
         Color A: orange, dyed with madder, color B: light gray, dyed with logwood gray.
Needles: US #2 
Gauge: 33 sts x 38 rows = 4" x 4" over colorwork pattern.
Finished Measurement: ~4 1/4" width x 9" height.


Garter Pattern (total 4 rounds): k 1 round, p 1 round, k 1 round, p 1 round.


With yarn B, CO 70 sts.
Place first marker at the beginning of the round, place second marker after 35 sts to indicate half of the round.
Work Garter Pattern once.

Begin Chart 1 over the first 35 sts, repest for the next 35 sts.

Work Garter Pattern once in yarn B.

Switch to yarn A and k 4 rounds.

Work Garter Pattern once in yarn B.

Begin Chart 2 over the first 35 sts, repeat once for the next 35 sts. 
Work all 28 rows of chart 2.

From now on, work only with yarn A.

Next round (decrease round - decrease because gauge difference of single color from colorwork knitting):  *ssk, k8, ssk, k11, k2tog, k8, k2tog. Repeat from* (total 62 sts left.)
Next round:  k all sts.
Next round (thumb placement over 9 sts):
        For right hand – k 10, slip the last 9 sts from right needle back to left needle, use 12” waste yarn and knit the 9 sts again. Resume knitting with yarn A and k rest of the round.
        For left hand – k 34 sts, slip the last 9 sts from right needle back to left needle, use 12” waste yarn and knit the 9 sts again. Resume knitting with yarn A and k rest of the round.


 (shown left hand mitt) knit 34 sts after second marker. 


 slip 9 sts from right needle to left needle


k 9 sts with waste yarn


K all rounds until 1 1/2” from finger tips. 
Next round:  slip first marker, ssk, k to last 2 sts before second marker, k2tog, slip second marker, ssk, k to last 2 sts before end of round, k2tog.
Repeat the decrease every round until only total 6 sts left.
Next round:  * ssk, slip the st from right needle back to left needle and pass the next st over it. (2 sts decreased.). Repeat from *
Cut yarn and thread it through the last 2 sts. 

Thumb:
(This is easiest with 2 needles to pick up sts. If you use other methods to work in round, it’s easiest to pick up with 2 needles first and then redistribute them as you like over needles.)
With first needle, pick up 1 st on the row to the right side of waste yarn, pick up the 9 sts below the waste yarn, pick up 1 st on the row to the left side of the waste yarn. 
With second needle, pick up 1 sts on the row to the left side of waste yarn, pick up the 9 sts above the waste yarn, pick up 1 st on the row to the right side of the waste yarn.
Total 22 sts pick up.
sts.

Join yarn, knit  in round until 1/2" from tip of thumb. 
 
  
pick up 9 sts below waste yarn, and 1 st on either side
pick up 9 sts above waste yarn, and 1 st on either side

pulling out waste yarn


ready to knit in round 


Begin shaping for thumb:
Next round:  ssk, k to 2 sts before the second marker, k2tog, ssk, k to last 2 sts, k2tog.
Repeat the decrease every round until only total 6 sts left.
Next round:  * ssk, slip the st from right needle back to left needle and pass the next st over it. (2 sts decreased.). Repeat from *
Cut yarn and thread it through the last 2 sts. 
 
Weave in ends.

Block.

 Chart 1


Chart 2 


Mittens 2


Yarn: Sports weight. 
Color A -  Light Brown - Dyed with Cutch, Madder and modified with iron.  
Color B - Yellow - Dyed with Rabbitbrush flowers and modified with iron.

Needles: US #2

Gauge: 30 sts and 40 rows = 4"  x 4"  (the row count is not as important since you can lengthen or shorten the mittens.)

Finished measurement: 4" width x 11" height

CO 60 sts 
place first marker at the beginning of round, and place the second marker after 30 sts. 
Use Color B and work Garter rounds for 4 rounds (k 1 round, p 1 round, k 1 round, p 1 round.)


Switch to Color A and work cable chart row 1 for 30 sts, place marker, repeat for the next 30 sts.
Continued the cable chart for the first 30 sts, and work only row 1 for the next 30 sts for the entire mitten.
Work until desired length for thumb placement (about 6" from the CO).

Next round, thumb placement over 10 sts:
      For right hand – work to second marker, work 11, slip the last 10 sts from right needle back to left needle, use 12” waste yarn and knit the 10 sts again. Resume knitting with yarn A and finish rest of the round.
      For left hand –  work to second marker,  work 29 st (1 st to the end of round,) slip the last 10 sts from right needle back to left needle, use 12” waste yarn and knit the 10 sts again. Resume knitting with yarn A and finish rest of the round.

Continued in established pattern until about 1 1/2" from fingertips (mine was another 3 3/4" from thumb placement.) 

Begin shaping top:
 (Now stop repeating cables on the first 30 sts,  just work them in row 1 only)
Next round:  sm, ssk, work in est patt to 2 sts before second marker, k2tog, ssk, work  in est patt to last 2 sts, k2tog.
Repeat the decrease every round until only 4 sts left.
Next round:  k2tog twice. 
Cut yarn and thread it through the last 2 sts.

Thumb:
(This is easiest with 2 needles to pick up sts. If you use other methods to work in round, it’s easiest to pick up with 2 needles first and then redistribute them as you like over needles.)
With first needle, pick up 1 st on the row to the right side of waste yarn, pick up the 10 sts below the waste yarn, pick up 1 st on the row to the left side of the waste yarn. 
With second needle, pick up 1 sts on the row to the left side of waste yarn, pick up the 10 sts above the waste yarn, pick up 1 st on the row to the right side of the waste yarn.
Total 24 sts pick up.
work in round in est patt (or just purl all sts) until 1/2" from tip of thumb. 

Begin shaping:
Next round:  sm, ssk, work to 2 sts before next marker, k2tog, ssk, work to last 2 sts, k2tog.
Repeat the decrease every round until only 4 sts left.
Next round:  k2tog twice. 
Cut yarn and thread it through the last 2 sts.

Weave in ends.

Block.