Wednesday, November 25, 2009

Red and Everything

In Love with Red
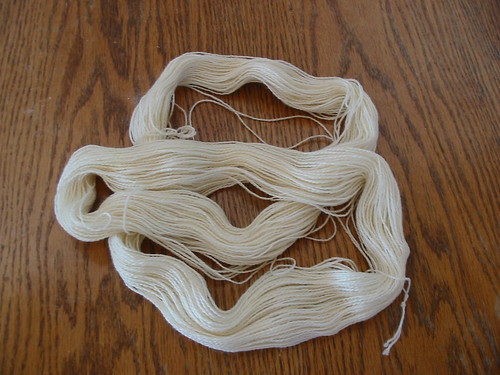
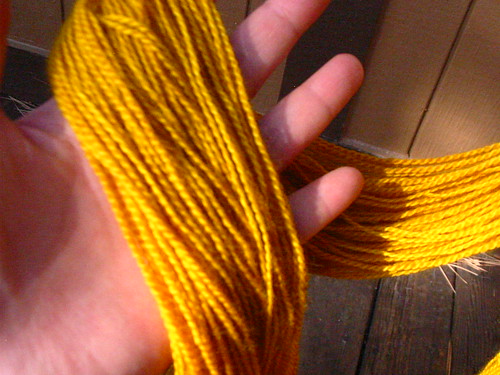
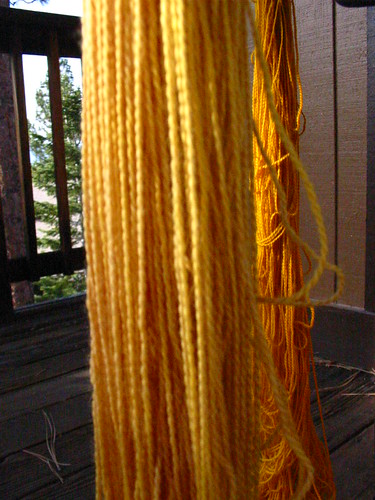
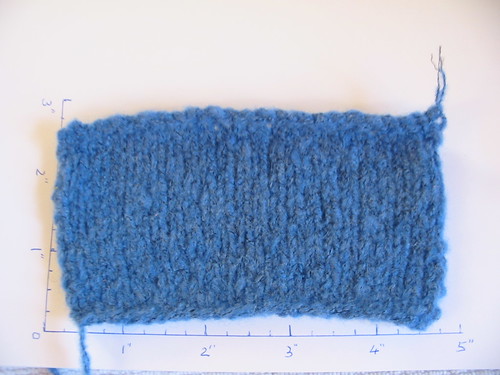
yarn: Elann Limited Edition Tremolo
needles: US #2

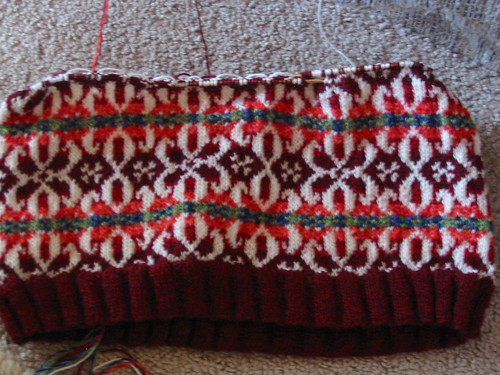
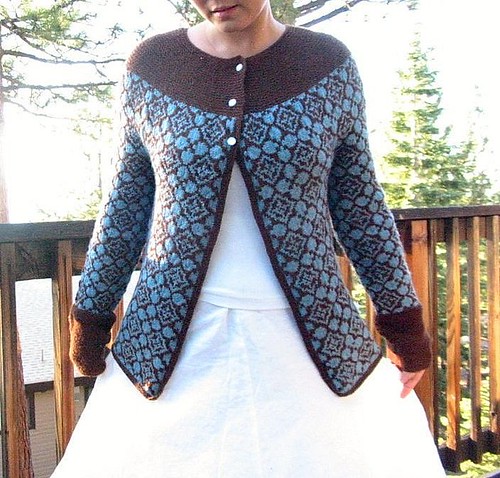
I finished my first fairisle sweater. The motif design came from a quick scribble on paper and then some playing around on the excel.


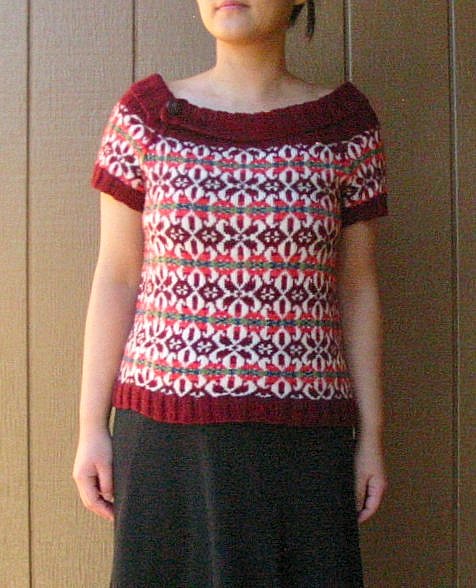
The knitting didn't take me as long as I'd expected. The yarn was slightly splitty, but the resulting fabric was so worth it for being really soft against skin.

Initially I just wanted to try a fairisle style sweater with regular neckline. I then became more and more in love with the sweater and wanted it to look a bit more feminine to unifiy how busy of the colorwork had become. I ended up with an idea of a wider neckline with folded down ribbing and split at the side.

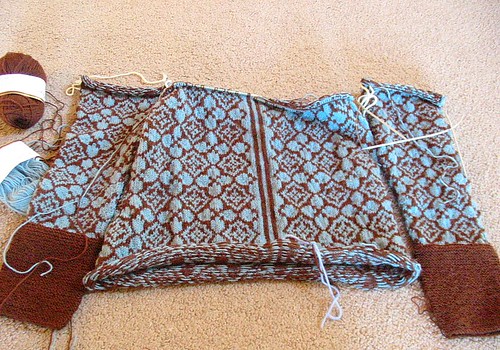
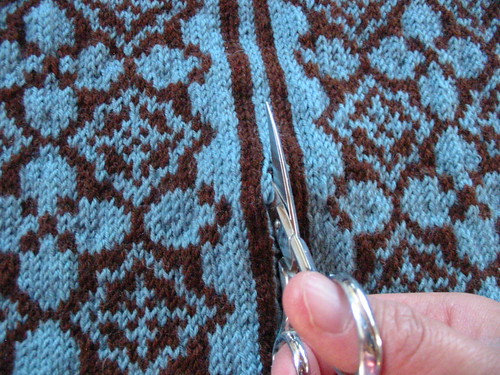
The only drama was the motif was centered with the division of two adjacent motifs in the middle when the sleeves joined the body. After about 2 inches of work I tried it on and was not pleased. Took some pictures with a motif as the center and preferred it much more. So two days of work ripped back. The body and sleeves are rejoined with the a motif centered correctly.

I can't say enough about how I love seamless construction. I'd use them whenever I can.
This sweater was knitted in round both body and sleeves with no shaping. The 4x4 ribbings were 1.5", then the motif began. Each motif was 21 sts, with body I did 14 repeats of that, and with each sleeve, it was 5 repeats of that. Then they joined and immediately begin the raglan decrease for about 3.75 inches (had to plan a little ahead of time of where motif was going to join and end at neckline.) The raglan decrease was made by placing a marker at each of the 4 points where sleeves joined the body, and decrease 1 st at either side of the marker every other round (8 sts decreased every decrease round.) Just make sure the st decrease is the one either before or after the st that's right next to the marker that way you get neater raglan lines (i.e do k2tog before marker, and ssk after marker if they're k stithces.) On the last row of motif (I think it was dec 4 sts within each motif repeat.) Then knitted one round in main color and made some decrease there. Then the 4x4 ribbing of neckline began, I split it at the side of front right raglan line, and CO extra 4 sts for overlap for button. After the split, the neck was worked back and forth instead of round with no further decrease. I think the ribbing was about 6.5-7 inches.


Some printmaking too...


Lately I also got into monotype after a colleague showed me printing from gelatin. I was too lazy to cook up the gelatin, so I used rubber block for block printing and print with that. I'm having a blast. It's a real nice break from painting. It feels so free (I take painting way more seriously sometimes that it drives myself crazy thatI'm never statisfy with my work.) I've been churning out all these monotypes and it brought back memories of college years in printmaking classes. Honestly, I never liked printamking because it's so restrictive in process and result. Being a painter, I much prefer being able to respond to what I have just put down on my canvas instead of a process that goes from point A to point B in a linear way and then you print and you finally see the result, and usually they're so disappointing. That process to me always felt so removed. Monotype, on the other hand, allows more editing and responsiveness.

So I used the motif I made for "In Love with Red" for some of the latest monotype.


I think I'm gonna do more of it this weekend.


Wednesday, November 11, 2009

Dash of Turmeric

I've been thinking about dying yarn. A while back I bought two skeins of Undyed Superwash Merino from Elann and they had been sitting there waiting to be bathed. I thought I can start with edibles rather than chemical dyes. This morning I went to Safeway and bought some pomegranates and some tumeric.


Undyed yarn

The pomegranates looked absolutely gorgeus, the seeds, the intense color juice. I cooked them with water and soaked a skein yarn into it, then added some white vinegar. It came out rather boring with the color was very light. I decided to be a bit adventurous and added a dash of tuemric. Immediately it soaked up the yellow and the yarn turned out to be a rather buttery yellow. I think even without the pomegranates, the yarn would've looked like that with little tumeric.


Pomegranate Soup


Kind of non-descript color


The one started with pomegrante then added in turmeric. It really took the yellow of tumeric.

The second skein was cooked with a lot more turmeric and some vinegar. And it came out with a very intense golden yellow.


the intense yellow with pure turmeric.

The part I liked the least was rinsing them. It took a long, long, long time to rinse the pure turmeric one until very little color run in the water.

Overall, it was fun. My skeins got tangled up a bit. But I was able to sort them out and wind up in cakes.

Drying


All wound up in cakes

This can be addictive. I'm thinking of getting more yarn and some dye for more colorfast dye job.

As far as knitting goes, I've begun working with my fairisle design using Elann Limited Edition Tremelo. I made the motif again with Excel. I got about 8" knitted in round. The yarn is a slightly splitty, but very soft to work with. The color combo is interesting to me. I picked the color simply based on the limited color selection the yarn has when it came on sale last month. Paul thinks the pattern with the colors is too busy, but I like it that way. I like the light red, to me it's a bit retro. And I like a little craziness sometimes.
Right now I'm still having a hard time picturing how it will look finished. Perhaps it may be a bit garrish, but heck why not? I can do garrish.


Saturday, November 7, 2009

Moroccan Night


Yarn: Elann Sock It to Me 4 ply, 4 balls of Mineral Blue, 5 balls of Chestnut
Needles: #2

The Moroccan Night is finished. I decided to call it that because the inspiration for the motif was based on the plaster carvings that I was so mesmerized by when I was in Morocco.

an example of plaster carving I saw in Morocco

Lately, I've became obsessed with working with colors. I mean more than one color in each project. After the "Blue Lotus" I became addicted to making my own motifs. So I had in mind of a motif that reminds me of geometric design in Islamic Art. I love, love, love Islamic art and architecture. Looking at the intricacy and interwoven pattern I'd often feel a surge of emotion and a sense of sublime. I'm always haunted by the beauty in their designs. They are brilliant examples of how moving abstraction can be without going through imagery and tap directly into our emotions. It's not only the designs alone, it's the combination of that and the material, and the environment, and the space they occupied.

It took a few try to get the design right. To figure out the motif, I cut out little squares of paper and arranged them around on the table to work the positive/negative space and design. Using Excel made designing a lot easier than on graph papers. First swatch was done in blue and light gray. I wasn't as thrilled with the low contrast of the two colors, and the design obviously needed some more work too.


Blue and Gray that didn't work out.

I decided blue (it actually has some teal in it, more like robin's egg blue) and brown would make a good combination, soI went ahead and ordered the yarn from Elann.

Call me crazy, but I knew I wanted to do steek. Even though I'd done it before, but that was over a decade ago. It was my very first knitting project and with beginner's luck and beginner's ignorance, I wasn't even nervous and everything worked out well. This time around I secretly enjoyed the nervousness and the thrill of unknown.

Provisional cast on was used because I really wasn't sure about how I wanted the hem to look. Even though the knitting took a long time, but its progress was satisfying. All along I had this vision of a fitted set-in sleeves with brown shawl collar. But as I was getting closer to the armhole part I became more and more uncertain. Part of it was my little confidence in figuring out the set-in sleeves and how to decrease it with steek lines. One morning I woke up with the brilliant idea of doing the yoke in contrasting color. That solved my dilemma. Looking at the sweater, I am very pleased with that decision because I like the look, and most of all it was a lot easier to make. For once, I feel pretty smart.

The cardigan was made in the round, both the body and the sleeves. Then joined together. The decrease was done mostly on the solid color garter st yoke area, so not much brain work there. It was seamless knitting. The only sewing I did was the armpit area using kirscher's stitches.

  1. I knitted the body first, then the sleeves. Body began with provision CO and started the pattern immediately after first round. 14 repeats of pattern around. 6 for the front, 6 for the back, and one at each side for later armpit sts that will match sleeve armpit sts. The sleeves began with about 6" of garter sts in brown then changed to pattern. Also some shaping in the sleeves that a full repeat of pattern across after all increases were done. They are stopped at the same row of the pattern and put on waste yarn.
  2. Then joined the body and sleeves together with one pattern repeat on the side seams of sleeves and body on holder for later armpit join. Because exactly one pattern repeat on hold for each side of body and each sleeve, the knitting across was easy with pattern continuing around smoothly with no change to pattern.
  3. Continued evenly in pattern for about 5".
  4. On the last few rows of the last pattern I strategically put in decreases into each pattern repeat. Then put stitches on waste yarn.
  5. The scary part began: Machine sewing lines before steek, cutting steek.
  6. For the front and bottom hem: pick up sts along front and the bottom (provisional CO came in handy,) and back up the other front.
  7. Few rows of garter sts. The hems are done.
  8. Then the yoke part took me only two days.
  9. I picked up sts from waste yarn and worked back and forth, making 22 sts decrease every 8 rows (or something like that, I kinda improvised as I went.)
  10. It ended with about 4" of garter rows in brown.
  11. All that left was stitch together the armpits and sewn in the buttons, and weave in the ends.

The steeking was rather anticlimatic. Sewing the lines, and cutting all went smoothly. Not that I'm complaining or anything, but aftern all the anticipation, it was done before I knew it.


Body and Sleeves before joining


Coninnued 5" in pattern aftern joining body and sleeves


Looking at the steek lines


View of the back with machine sewn in lines to secure yarn before cutting


Cutting the steek


Blocking colorwork knitting is like playing magic. It can transform an awkward looking puckery sweater into a beautiful one.

I love the sweater. The part I'm most proud of is how cheap I was able to pull it off! I only used 4 balls of Elann Sock It To Me 4 ply in Mineral Blue, and 5 balls in Chestnut. That came out to be $20.70 Then the buttons were 6 for $1 at Joann's and I only used 3. I feel so smug about making a nice FO with tiny budget. The yarn was no cashmere or soft merino, but it is sturdy and does the job well. It is actually kinda sticky which I may not normally liked but for a stranded colorwork knitting, it's great. I'd made the Don Quixote mittens with it before. The great thing is I can wear it against skin without feeling scratchy since it's superwash. When I make another stranded work I'll definitely consider this yarn again.

Sunday, November 1, 2009

Kashair

Elann Limited Edition Kashair
Fiber Content: 60% Wool/25% Cashmere/ 15% Acrylic
Care: HandWash, Dry Flat
Gauge: 20st/4" 4.0mm (US 6)
Yardage 175m (191 yards) per 50g ball
Price: $3.48

OK, if you hand me this yarn and let me guess its fiber content, I don't think "cashmere" would be my first guesses. And if you let me knit it up, I may actually guess it's part cotton. Though that is obviously a wrong answer, I could, however, tell that it's a mutt, a blend of different fibers. But I'm no expert in textile or fiber. My experience with cashmere is so limited. Hmmm... I wonder what would it be like to hug a cashmere sheep....

Then if you proceed to tell me that one of its content is cashmere, I would've guessed the cashmere sheep had accidentally fell into a hot spring and enjoyed a long, hot bath and became felted.

Just a thought, instead of making blend, can people just breed mutt sheep so their wool is already perfectly blended, like a mixed breed of merino and cashmere? But of course my favorite blend would be nearly impossible except in science fiction: merino sheep mix with silkworm.

This yarn string looks felted, and to me knitting with it was like knitting with cotton or cotton chenille. Soft cotton that is, not one of those stiff cotton ropes. The yarn is uneven in texture, which means not super fast knitting. It also means the resulting fabric has more of an organic look. It was definitely interesting to me. I'd never worked with anything like it before. Feeling the yarn (yes, I rub yarn against my neck for scratchy test... the good ones can make me purr...) well, I didn't purr with this skein, but I could tell its itchy factor is very low, could be non-existent.

This yarn also looks matte, but rather cozy looking.


Elann recommended #6 needles, so I automatically went down one size because I'm a very loose knitter. I was getting the recommended gauge of 20 st=4", but I found stitches to be way too loose and open, the knitted fabric was too ugly even for me. This was not doing any justice to the sheep so I ripped back the swatch and re-knitted with #4. The result was much better at 21 st x32 rows.


Before Blocking (CO 24 sts.)

I filled the sink with mostly cold water and a splash of warm water (it's still cold, just not icy cold) and left the swatch in the water for about 25 minutes. This time I actually remembered to take it out instead of letting it sit there for hours like I usually do.

When I fished it out from the water, the yarn looked even more felted. That was some drastic change in look. I had a mental cartoon image of the sheep having those curly hair that frizzes like crazy with even the slightest humidity in the air. The stitches evened out a lot. I didn't pin the edges 'cause Iwas curious to see how will the swatch dry.


Swatch drying

It's interesting that one may be able to achieve the look of felted object without the garment being stiff. At this point, I may be tempted to make some cozy looking socks with it. Or a hat, or a neck warmer. Because it's not one of those smooth, fast knitting yarn, I probably won't be too tempted to make a sweater out of it. But that's just my lazy side talking. I can see e a very fun looking cardigan with this yarn .... or maybe a robe.

The after blocking swatch is very soft, and the stitches bloomed and evened out. Now I feel like I can actually feel the cashmere in it. I may even purr a little. The curling edges flattened out, but it still need different stitches other than St st or hems to make edges lay completely flat.

It was a bit hard to count the stitches after blocking. It grew from 21 sts per 4" to 19 sts, and from 32 rows to 30-31 rows.

The color is not entirely solid. There is some very, very subtle tonal variation from the different fibers spun together. To me that is always more exciting as it gives the color a little more depth. The wool in it gives that typical slight, short halo of light hair on the surface. The blue skein I received is quite lovely. If I'm more imaginative, I may try to come up with a garment that can utilize its faded medium denim look of the knitted swatch. This swatch definitely pass the itchy test and is soft and cozy.

Note to this photo: comparing my swatch to the photo, my stitches looks a bit more even in person. The hightened contrast in the photo accentuated each stitch more. On my monitor, the color is bit darker than the actual swatch. My swatch really does look like faded denim.

after blocking