Tuesday, December 21, 2010

In Time for the Holidays

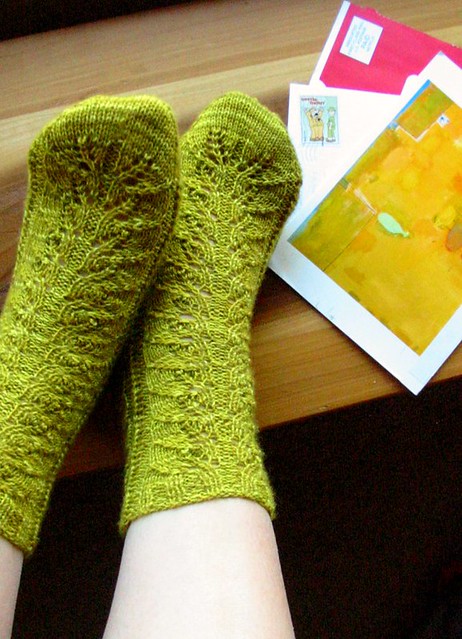
Looking at my yarn stash taking over the guest bedroom, I'm beginning to feel overwhelmed with guilt.  No doubt I won't really stop buying yarn when I see a good deal, but I've promised myself I'll make an effort to knit down my stash a little more.


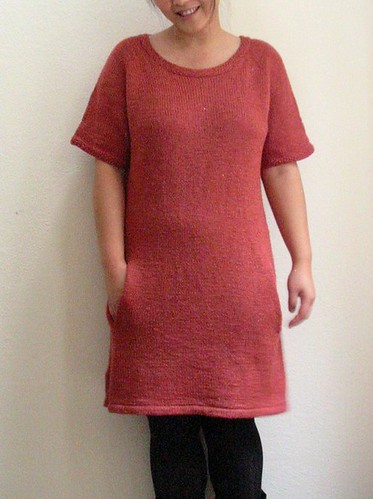
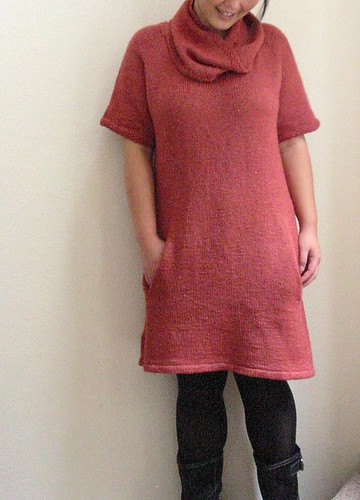
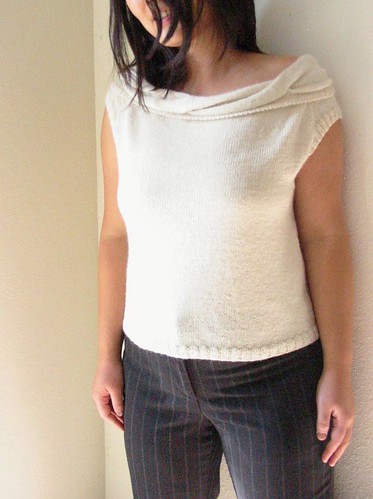
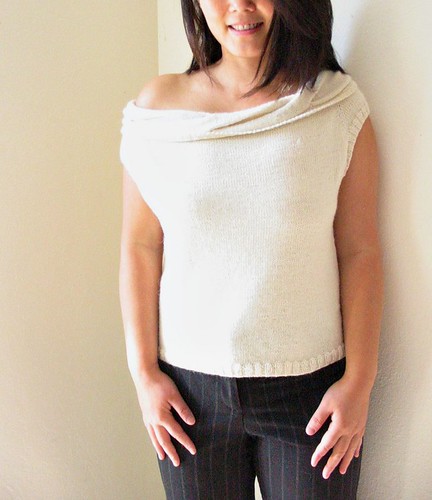
Starting with Crystal Palace Creme that I purchased nearly 2 years ago, I decided to make a tunic/dress with it.  I had't touched the yarn because I fell out of love with the color.  My taste of color seemed to change all the time.  This becomes a problem when I don't knit newly purchased yarn right away.  But I wonder if I stash it longer, my taste will eventually get back to that color.

This was a simple top-down raglan tunic with no shaping.  I added pockets.  It was fun to figure out adding pockets without any sewing! Seriously, no sewing at all for this entire tunic.  Next time I'll have to place the pockets  an inch or two higher as they sit a bit low to be comfortably resting my hands in them.  However, as far as the look of proportion I think they look better at this position than if they're higher up.

The pockets were simply increased 2 sts  between 2 sts for each pocket on the first round.  Then inc 1 st at outer side of the previously increased sts (for each pocket, 2 sts inc for every round) until desired width (they will fold in half) and at least 4.5" in height.  Then put all the increased sts on waste yarn to be continued after the tunic is done. To finish the tunic, resume back the original sts (before pocket increase) in round.  After the tunic is done, pull the pocket out so the RS is facing, and knit in rounds until desired length.  BO the sts by folding it in half lengthwise so half sts on one needle and the other half on another, and do 3 needle BO.

The tunic was so simple with only neckband  and armbands in seed st, everything else in st st. The neck band was picked up the neck sts at the very end.and knitted seed st for 7 rounds.  I made a more neck opening to the front by CO the back and sleeves as the width I wanted with only 1 sts CO for each front and gradually increased the front and eventually joined in round.  Since I had enough yarn left over, I made a simple cowl to go with it.


Yarn: Crystal Palace Creme. Color 2015, 9.5 balls
Needles: US #6 (and #5 for the neckband and armbands)


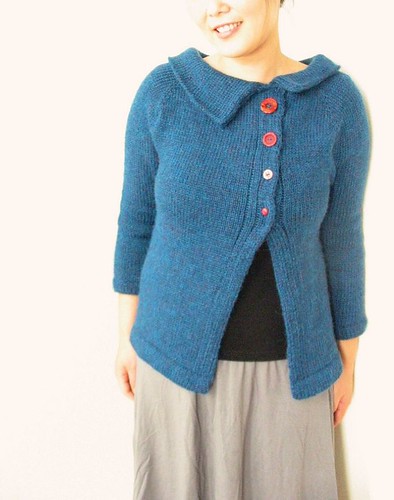
While I was knitting the dress, I thought about making a felted jacket.  At first I had something funky in mind with a different color. Then the tested swatches did not work out as I'd pictured, so another idea of making one with some yarn I'd already have in my stash to go with the dress came to me.

I bought the yarn few months back when Elann had bag sales of Elann Peruvian Highland Chunky. The color (Spiced Wine) I thought would be lovely with this dress  I bought enough to do several large swatches to test out the felting.  I made 4 large swatches and felt them at different length of time in the washer.

 Yarn: Elann Peruvian Highland Chunky, Color 727 Spiced Wine, 17 balls
Needles: US#10


The jacket was also super simple in construction, top-down raglan sleeves with pocket holes.  I decided to sew in fabric lining for the pockets afterward (that part I did not enjoy as I'm not that good at sewing) rather than knitted because of the concern for bulkiness.

I put the jacket in the washer with hot water for 7 minutes.  It felted somewhat more than the swatch, sigh, and unfortunately there was a small area that didn't felt quite as much as the rest.  So back in the washer for another minute.  I was disappointed that it felted more than I wanted (I wanted a slightly thinner fabric with a very slight stitch definition,) though the length and width were still within my plan.  

Originally I was going for a straight center front opening with regular collared jacket.  But the collars came out a bit too dramatic of increased flare than I'd like, and the neckline stretched a bit wide even after some sewing with yarn afterwards, so I decided to place buttons at different areas for a different look and better fit.  Now I like it even more than my original plan.   The jacket and the dress go well together as an outfit if I may say so. What I really love is the textural contrast of the matted felt fabric of the jacket that contrast with the pearly sheen of the tunic due to silk in its fiber content.  The contrast helps to break the monochrome when the colors of the two are in the same family.  The Elann Highland is so beautiful in color that there are actually many other colors of  super thin strands mixed in to give it some depth.

I am glad to have finished them in time for the holidays.  I do hope to wear them when I go down to the Bay Area this week. 

Now that I'm on winter break I have plenty of time to knit, so here are couple other quick stash knit down projects I did this week.

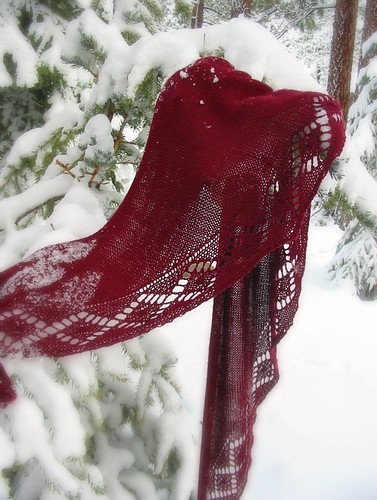
First,  "Acadia Shawl - designed by Melisa McCurle".  It was made with Nako Bambu left over from the Red - the Lace Tunic I knitted back in April.  Needle size #8. A very nice pattern, I like this yarn better with this shawl than with the Red tunic.   The color is so rich here.  I only made 8 repeats for the center non-decreased part because I was worrying about running out of yarn.

Yarn: Nako Bambu, 5 balls
Needles: #8


Then I made a hat for Paul using the leftover Elann Peruvian Highland Donegal
The design was called Nottingham by Melissa Mall. 
I liked this design a lot.  Paul loves the hat.  It's definitely warm for the cold winter we're in now. I may make more since it was such a quick knit.  I started it last night and was able to finish it this morning.
He is such a good BF.  Last night I told him that I was making couple of very small (wish I make more money...) donations to dog rescue places, he wrote a check to match my amount plus more even though he is unemployed at this moment (though he gets hired back by the government almost for sure in the spring every year so it's not a scary unemployment like the so many people we know and he actually loves having few months off in winter for snowboarding.) 

Yarn: Elann Peruvian Highland Donegal, 1.3 balls
Needles: #6

Now I'm so ready for the holidays.  I haven't done any gift shopping yet as I absolutely hate going shopping this time of year.  I'll have to come up with ideas of exactly what I was going to get for each person before I get to the store.   Sadly, most of my family don't really care for hand knit items.  I made my mom a beautiful shawl years ago and a sweater, she had not worn them once.  Neither did my older sister with the cashmere cowl I made her.  So it's gonna be store bought this time. 

I hope everyone has a wonderful, and warm holiday season, and peace to all.  

Sunday, November 28, 2010

Cables, A Lot of Them


A while back, Elann had a bag sale on its house brand Peruvian Donegal.  I'd never used this yarn but always curious about it.  I decided to splurge after seeing the lovely feature design.  I bought two bags.  One bag is never enough for a sweater, and often two bags are too much.  I figured I can always make a vest or few hats or mittens with the extra.

I really liked the yarn when I opened up the box.  I actually just let the bags of yarn hang out in the living room and never bothered to store it.  Somehow, I knew I wanted to get to it soon, and constantly seeing it would give me some ideas what to do with it.

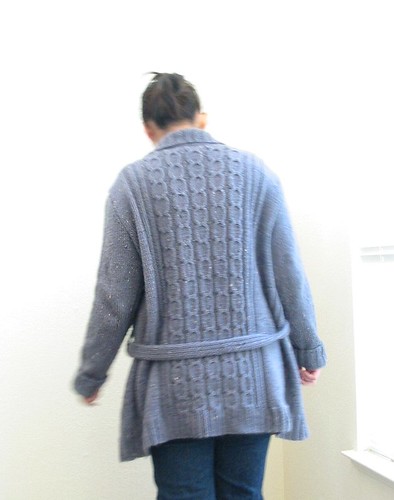
I did get to it in 3 weeks.  With 20 balls of yarn I decided to go with a very basic cable long coat with straight forward silhouette, big ribbing button bands and collars.  I knitted up a big swatch with a stitch pattern I found on a book.  When I started knitting, I changed the stitch pattern somewhat.  It was the same stitch count for each repeat, so no need to recalculate.  I did a quick small swatch just to see the modification of stitch pattern I had in mind would look alright.

It was a lot of cabling since there are total 11 columns of cables, and cabling twice every 10 rows.  It felt like it was going on forever especially with the longer than usual sweater length.  Cables, and more cables.

The yarn was nice to work with.  It's nothing fancy, but I really like it.  I like how basic it looks when knitted up, yet it's not too scratchy (though not next to skin wear.)  I want to make more sweaters with this yarn in different colors.   While knitting I was afraid it will get too heavy to wear with all that yarn.  But when I tried it on after sewing the shoulders together, it didn't feel heavy at all.

It came out slightly bigger on the shoulder because the ribbing tend to stretch out a bit comparing to measuring it in swatch.  That's the minor thing I'd fix it if I were to make it again.  But all in all, I'm in love with this sweater.  It's nothing clever, nothing fancy, nothing designy, just a good o' cable sweater with a belt.  It's so me.  It is comfortable,  it is warm.  Many of the sweaters I make I only wear them when I go out, and I don't wear them to work (except accessories) and they become a bit precious. The reason I can't wear them to work is I know I'll inevitably get some charcoal or paint on them.  But this one, I can see myself wearing it all the time, even to work.  In fact I wore it around the house all afternoon today 'cause it was so very snuggly and warm for this cold winter day.   


It was knitted bottom up with front and back as one piece up to armpit.  The set-in sleeves were knitted separately.   Then I pick up stitches along the front for button bands, then pick up stitches along neckline for collar, all these were done in 2x2 ribbing, so was the belt.

I had only 2 balls left.  I think I can make a matching hat.

I didn't even have to buy buttons.  I found exactly 4 buttons in my button bag that are the right size and are gray. Perfect.

I'm now dreaming of another sweater using the same yarn in brown.... or maybe white...

Sunday, November 14, 2010

A Sweater and Two Pairs of Boots

I made a sweater, but let me first tell you about the new boots I bought.

This is so exciting, I actually found not just one pair, but two pairs of boots that my thick calves and wide feet can fit into.  Even better, the store had a sale of "Buy one pair shoes, get two pairs free."  So I had to grab another pair of shoes too. 

I got them at the Bass outlet in town.   I had not bought any shoes in over a year so even though I felt very guilty for spending $110 but isn't it awesome that I got 3 pairs of shoes? A girl's dream shopping day!

For those of you with nice thinner calves, you have no idea how big this is.  It's like finding Holy Grail - tall boots that fit and the not making the legs look like gigantic elephant trunks, and stylish enough. This is seriously exciting.


So they're not exactly the best shoes to go with the new sweater I made.  But I didn't care, I just wanted to wear them and show them off here.

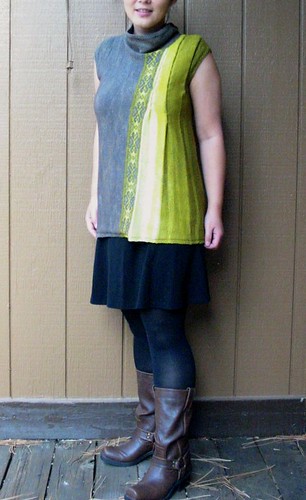
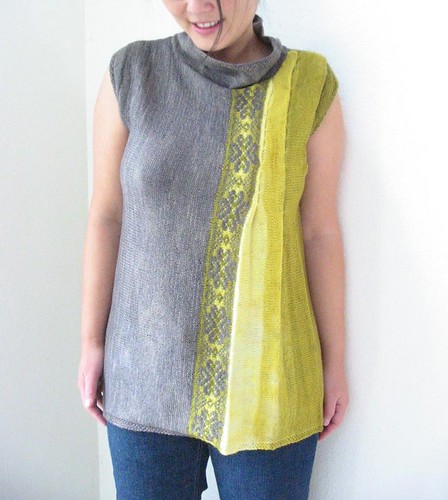
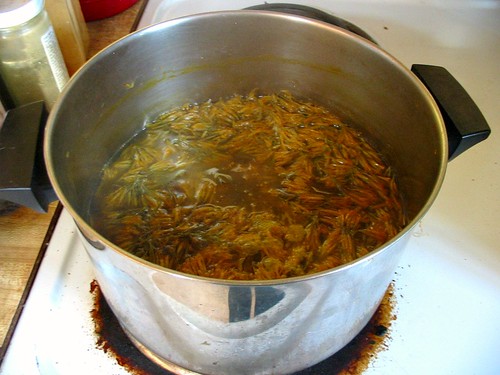
Oh, and the new sweater.  I dyed the yarn with Rabbitbrush flowers that I gathered earlier this fall.  I just had this idea of dyeing varied tones to make a sweater. The flowers yield very loverly and bright yellow.  The lightest yellow were quick dips, and iron was thrown in the dye to modified it to green.  The dark greenish gray was first dyed with Rabbitbrush and iron, then overdyed with Logwood Gray that I purchased.  They were mordanted with alum.
My idea was to make a sweater that is more modern than traditional Fairisle (which I love and I may still make one with the leftover yarn - though it will have to be a vest or very short sweater with the amount I have.)   

It was knitted sideway.  First the Fairisle band, then the multi-tones folding section.  I was kinda uneasy about it because I'd never knitted anything sideway, but the calculation was so much easier than I expected.  I'd love to do another sideway sweater soon.  The construction was very simple, all st sts.

The sad part was when I blocked the sweater, the pinning stained the sweater on the lightest stripes of color.  It was so so very sad.  I used stain remover which lightened up the stains a bit, but it also created few light spots.  In the end, it looked better than the stain spots, and in real life it's not as noticeable.


I have to say, I really love designing my own sweaters.  Part of it comes from my not liking to follow directions (in knitting and in life.)  I tend to get bored half way through knitting a pattern, even though I have enough discipline to always finish the knitting.  With designing my own, I get to think about it as I go, which is the process I love. I very often changed ideas as I knit. I love tweaking things and trying to come up with an idea within the specific confine of the material.  For this one, I dyed the yarn first and let them sit while allowing ideas to brew. The criteria here was to show off tonal variation, yet remain simple enough even with some fairisle thrown in.   My inspiration was the aspen trees that were so breathtakingly beautiful few weeks back.   I took the verticality of the trees and combined with tonal variation of the foliage.   To capture the flickering light when the leaves rustle I thought the band of fairisle may work.  The dark greenish gray was the pine trees of the woods surrounding it to give contrast.   So I called this "Aspen".


I

Sunday, October 31, 2010

Lost and Found


I've been playing with natural dye and having tons of fun lately.

It began during my trip to Istanbul.  I had a wonderful chat with a rug dealer at the Grand Bazaar.  He was not pushy to sell at all (all we ended up buying were the cheapest things in the shop - few pillow covers, the only thing we could afford.)  After the sale, he invited us to sit down for some tea. We talked about so many things, his trips to the U.S. and his favorite place was Montana, and the friendliness and easy attitudes of Americans that most people in other parts of the world don't see.  We talked about Orhan Pamuk's books.  We talked about Turkish culture, and Grand Bazaar.  And we talked about rugs and dyes.  He said, "but natural dyes are much better. Sure they fade over time, but the colors are so much more subtle and interesting.... "  We talked about cochinal bugs, etc.  Ever since then I'd been thinking about natural dyed yarn.

I'd actually never seen knitting yarn with natural dyes before except for the ones I did with turmeric which was soooo not lightfast.  I don't mind color fading over time and that is what natural dye does, but when color fades noticeably within 2 or 3 days, it was discouraging.  So on my last trip down to Bay Area, I stopped by A Verb for Keeping Warm Berkeley store.  It was a little jewel of shop.  I was immediately drawn by the color of the natural dye yarn they have in the store.  Though I had no money left to buy any yarn there, I thought to myself, I must try dyeing some yarn myself using natural dyes.  Few weeks later, I ordered some dye from Botanical Colors and some yarn, and began my dyeing frenzy.

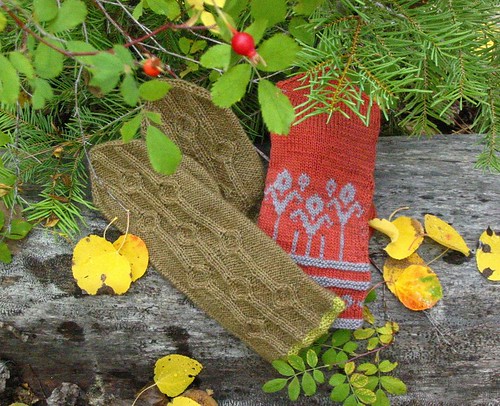
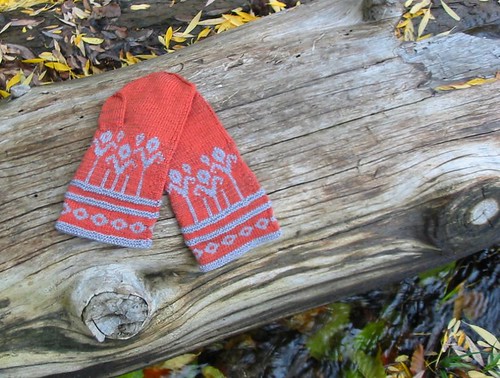
After much playing, I had a big load of yarn.   So I decided to at least knit coupla quick projects up to see how they look.  I made a pair of mittens for myself and a pair for Paul.  I really do love the way the colors came out.  I learned big way that different yarn takes dye so differently. Superwash yarn take up way more dye than non-superwash.  BF Leicester yarn (like the brown mittens) does not take up nearly as much dye, thus gives a more delicate coloring.


So I wrote down notes for the mittens.

Mittens 1 


Yarn: fingering weight. 
         Color A: orange, dyed with madder, color B: light gray, dyed with logwood gray.
Needles: US #2 
Gauge: 33 sts x 38 rows = 4" x 4" over colorwork pattern.
Finished Measurement: ~4 1/4" width x 9" height.


Garter Pattern (total 4 rounds): k 1 round, p 1 round, k 1 round, p 1 round.


With yarn B, CO 70 sts.
Place first marker at the beginning of the round, place second marker after 35 sts to indicate half of the round.
Work Garter Pattern once.

Begin Chart 1 over the first 35 sts, repest for the next 35 sts.

Work Garter Pattern once in yarn B.

Switch to yarn A and k 4 rounds.

Work Garter Pattern once in yarn B.

Begin Chart 2 over the first 35 sts, repeat once for the next 35 sts. 
Work all 28 rows of chart 2.

From now on, work only with yarn A.

Next round (decrease round - decrease because gauge difference of single color from colorwork knitting):  *ssk, k8, ssk, k11, k2tog, k8, k2tog. Repeat from* (total 62 sts left.)
Next round:  k all sts.
Next round (thumb placement over 9 sts):
        For right hand – k 10, slip the last 9 sts from right needle back to left needle, use 12” waste yarn and knit the 9 sts again. Resume knitting with yarn A and k rest of the round.
        For left hand – k 34 sts, slip the last 9 sts from right needle back to left needle, use 12” waste yarn and knit the 9 sts again. Resume knitting with yarn A and k rest of the round.


 (shown left hand mitt) knit 34 sts after second marker. 


 slip 9 sts from right needle to left needle


k 9 sts with waste yarn


K all rounds until 1 1/2” from finger tips. 
Next round:  slip first marker, ssk, k to last 2 sts before second marker, k2tog, slip second marker, ssk, k to last 2 sts before end of round, k2tog.
Repeat the decrease every round until only total 6 sts left.
Next round:  * ssk, slip the st from right needle back to left needle and pass the next st over it. (2 sts decreased.). Repeat from *
Cut yarn and thread it through the last 2 sts. 

Thumb:
(This is easiest with 2 needles to pick up sts. If you use other methods to work in round, it’s easiest to pick up with 2 needles first and then redistribute them as you like over needles.)
With first needle, pick up 1 st on the row to the right side of waste yarn, pick up the 9 sts below the waste yarn, pick up 1 st on the row to the left side of the waste yarn. 
With second needle, pick up 1 sts on the row to the left side of waste yarn, pick up the 9 sts above the waste yarn, pick up 1 st on the row to the right side of the waste yarn.
Total 22 sts pick up.
sts.

Join yarn, knit  in round until 1/2" from tip of thumb. 
 
  
pick up 9 sts below waste yarn, and 1 st on either side
pick up 9 sts above waste yarn, and 1 st on either side

pulling out waste yarn


ready to knit in round 


Begin shaping for thumb:
Next round:  ssk, k to 2 sts before the second marker, k2tog, ssk, k to last 2 sts, k2tog.
Repeat the decrease every round until only total 6 sts left.
Next round:  * ssk, slip the st from right needle back to left needle and pass the next st over it. (2 sts decreased.). Repeat from *
Cut yarn and thread it through the last 2 sts. 
 
Weave in ends.

Block.

 Chart 1


Chart 2 


Mittens 2


Yarn: Sports weight. 
Color A -  Light Brown - Dyed with Cutch, Madder and modified with iron.  
Color B - Yellow - Dyed with Rabbitbrush flowers and modified with iron.

Needles: US #2

Gauge: 30 sts and 40 rows = 4"  x 4"  (the row count is not as important since you can lengthen or shorten the mittens.)

Finished measurement: 4" width x 11" height

CO 60 sts 
place first marker at the beginning of round, and place the second marker after 30 sts. 
Use Color B and work Garter rounds for 4 rounds (k 1 round, p 1 round, k 1 round, p 1 round.)


Switch to Color A and work cable chart row 1 for 30 sts, place marker, repeat for the next 30 sts.
Continued the cable chart for the first 30 sts, and work only row 1 for the next 30 sts for the entire mitten.
Work until desired length for thumb placement (about 6" from the CO).

Next round, thumb placement over 10 sts:
      For right hand – work to second marker, work 11, slip the last 10 sts from right needle back to left needle, use 12” waste yarn and knit the 10 sts again. Resume knitting with yarn A and finish rest of the round.
      For left hand –  work to second marker,  work 29 st (1 st to the end of round,) slip the last 10 sts from right needle back to left needle, use 12” waste yarn and knit the 10 sts again. Resume knitting with yarn A and finish rest of the round.

Continued in established pattern until about 1 1/2" from fingertips (mine was another 3 3/4" from thumb placement.) 

Begin shaping top:
 (Now stop repeating cables on the first 30 sts,  just work them in row 1 only)
Next round:  sm, ssk, work in est patt to 2 sts before second marker, k2tog, ssk, work  in est patt to last 2 sts, k2tog.
Repeat the decrease every round until only 4 sts left.
Next round:  k2tog twice. 
Cut yarn and thread it through the last 2 sts.

Thumb:
(This is easiest with 2 needles to pick up sts. If you use other methods to work in round, it’s easiest to pick up with 2 needles first and then redistribute them as you like over needles.)
With first needle, pick up 1 st on the row to the right side of waste yarn, pick up the 10 sts below the waste yarn, pick up 1 st on the row to the left side of the waste yarn. 
With second needle, pick up 1 sts on the row to the left side of waste yarn, pick up the 10 sts above the waste yarn, pick up 1 st on the row to the right side of the waste yarn.
Total 24 sts pick up.
work in round in est patt (or just purl all sts) until 1/2" from tip of thumb. 

Begin shaping:
Next round:  sm, ssk, work to 2 sts before next marker, k2tog, ssk, work to last 2 sts, k2tog.
Repeat the decrease every round until only 4 sts left.
Next round:  k2tog twice. 
Cut yarn and thread it through the last 2 sts.

Weave in ends.

Block.  


Saturday, October 23, 2010

Sweaters

Here are coupla sweaters I made in the last month or so.
This one was inspired by the one Kira Knightley wore in "Love, Actually."


I changed the design a bit by skipping the ribbing at bottom.  My cable band came out a bit narrower too (not planned)  but  I like it.  It was knitted with Elann Peruvian Baby Cashmere, perfect yarn for pure luxury.


Then there was "Quack, Quack."
This was knitted with Elann Peruvian Sierra Aran.  Absolutely lovely color, too bad my camara cannot capture the depth of it.   I had this idea of an asymmetrical collar jacket for a while and I finally got to it.  The body was knitted top-down, the the collar was picked up stitches worked in short-row.  It came out pretty close to what I had planned. 


Friday, October 15, 2010

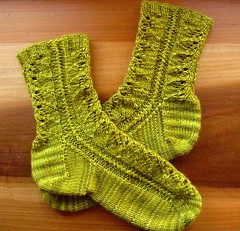
Rabbit Socks


I've been gathering flowers from Rubber Rabbitbrush  for dyes.  The yellow they produced is so brilliant and pretty.  I think its color fastness is really good for natural dye.  So far I have not seen fading on the yarn.  It dyes easily and the color gets absorbed into the yarn beautifully and very quickly.   I've been doing a lot of dying with Rabbitbrush, I just can't get enough of the lovely yellow and the shades I could play with.


First boiled the flowers for an hour, and then I strained the liquid for dye bath.  Added water to the dye, then added the yarn.  It really didn't take long to dye since the color got soaked in very quickly.  

I played with dip dye for variation of tones on one skein to see how it works, also threw in just a bit of iron at the end to give it a hint of green into the yellow.  As far as knitting up, I wasn't sure how I like it.  It's varied a bit much for my taste.  I have found that I like more even dye job when it comes to knitting.  But after a soak, the dye even out slightly and I'm loving the result.


Main stitch pattern for the socks was "Twin Leaves Pattern"  from the Second Treasury of Knitting Stitches by Barbary Walker.  To frame either side of it I came up with Twist Stitch Column (a very easy st that I think I saw it somewhere but cannot remember the exact source.)

Here is how I did it using 2 circular needles.
Needles:  US #1

CO 56 sts,  divide into 28 sts on each needle.
First round, on needle 1 work 3rd to 6th st of round 1 of TSC. (k2, p2) 6 times. On needle 2 work 3rd to 6th st of round 2 of TSC. (k2, p2) 6 times.
Second round, on needle 1 work 3rd to 6th st of round 2 of TSC, (k2, p2) 6 times. On needle 2, work 3rd to 6th st of round 1 of TSC. (k2, p2) 6 times.

Repeat last 2 rounds 3 more times (total 8 rounds worked.)

Leg:
On needle 1, work 3rd to 6th st of round 1 of TSC, work round 1 of Twin Leaf Patter over next 22 sts, p2 (the p2 are 1st and 2nd st of TSC).  On needle 2, work 3rd to 6th st of round 2 of TSC, work round 1 of Twin Leaf Pattern over nest 22 sts, p2 (these 2 sts are the 1st and 2nd sts of TSC.)
Cont' in established pattern until 6 Twin Leaf Pattern are completed. 

Heel flap:
work and move the first 3 sts from needle 1 to needle 2, move the last st on needle 1 to needle 2.  (24 sts on needle 1 and 32 sts on needle 2.)  Work back and forth in st st over the 24 sts on needle one and slip the first st of every row until 23 rows are finished.  End with a RS row.

Heel Turn - work over the 24 sts on needle 1:
First row (WS): sl1, p12, p2tog, p1, turn.
Second row (RS): sl 1, k3, ssk, k1, turn.
Third row (WS): sl 1, p to 1 st before gap, p2tog, p1, turn.
Fourth row (RS): sl 1, k to 1 st before gap, ssk, k1, turn.
Repeat third and fourth row until all sts are worked (14 sts remained on needle 1.)

Gausset:
First round:    With needle 1, pick up and k 12 sts along the righ side of heel flap, pick up and p 1 st between the heel flap and next st on needle 2.  Continue in est patt with instep stitch on needle 2.  With needle 1, pick up and purl 1 st between needle 2 and heel flap, pick up and k 12 sts along the left side of heel flap, k 14 sts, and pm to indicate beginning of round. 

Next round: k to last 3 sts on needle 1,  k2 tog, p1, continue in est patt on needle 2, for the first 3 sts on needle 1, p1, ssk,  then k to end of round.

Next round: Work in est patt evenly.

Repeat last 2 rounds until only 24 sts on needle 1 (total 56 sts on both needles.)

Work in est patt evenly until 2" before tip of toes, end with an even number round.

Work sts in est patt to the last 2 sts on needle 2.

Toes:

Move the last 2 sts on needle 2 to needle 1, and move the first 2 sts on needle 2 to needle 1 - 28 sts on each needle.

Round 1:  begin with needle 1,  *k1, ssk, k to last 3 sts on needle 1, k2tog, k1, rep from * for needle 2.
Round 2:  k all sts.
Repeat the 2 rounds 4 more times -  total 36 sts left.
Repeat only round 1 'till only 20 sts left.
Cut yarn.  Graft sts on needle 1 with sts on needle 2 together using Kirchener stitches.

Block. 


 Charts (click on the image to open it to larger and clearer image.)

Twist Stitch Column Pattern (TSC)


Twin Leaves Pattern

Friday, September 17, 2010

A Day in the Kitchen, and Not Cooking

Yay, the dye and the yarn I ordered arrived.  I was busy in the kitchen all day today.  Nope, I didn't cook.  I'm really a horrible cook.  Every time I mentioned that I'm going to make some food, Paul would immediately head to the kitchen and start cooking, that's how horrible my cooking is.  I was playing with yarn and dye.  This time instead of finding things in the cupboard to use as dye, I actually bought some natural dyes from Botanical Colors, and some yarn from Dharma Trading Co. 

I really like natural dye and how organic the colors do look.

The yarn I used were the  Wildfoote Luxury Socks.  I ordered 2, and each order was actully 2 skiens (and  430 yards each.)

I used alum as mordant.  An,d for the first time I used iron to chancge color.  Wow, how fun was that seeing the color changed and deepened instangly.

Here are the results.


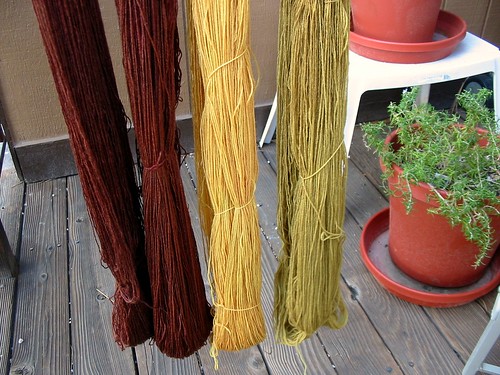
From left to right:
The two dark reddish brown are first mordant with alum,  then dye with cutch for 2 hours, then added iron, and then threw in madder for the red and dyed for another 20 minutes.

The yellow one was mordant with alum, dyed with weld for an hour, then after I fished it out, I wanted it more intense, added more weld and dyed for another 30 minutes.  Dumped the bath, and pour a bit of the cutch/iron/madder dye water into the pot and dipped the yarn in for about 15 seconds.

The greenish yellow was mordant with alum, dyed with weld for an hour, then dyed with osage orange, weld, logwood gray for 15 minutes, then put in the same more weld pot with the previous skein for 30 minutes.

 I am addicted even though the process does take a long time.
Now I have to come up with some project ideas for these yarns.

Sunday, September 12, 2010

Nevermore


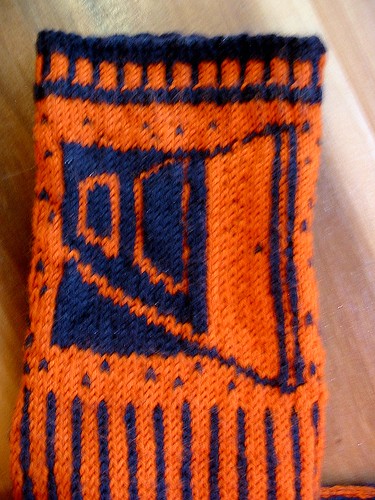
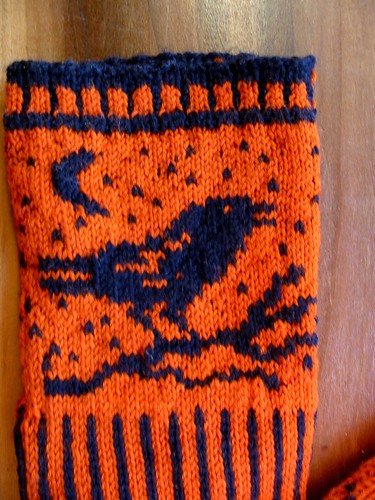
 I have been thinking about making a pair of socks for Halloween.  This year, I actually don't have to work on Halloween.  So I bought the yarn when I was visiting SF area last week.  Then the poem "Nevermore" by Edgar Allen Poe came to mind.  So I came up with the Raven, of course.  Then after some thinking back and forth, I decided to do an opened door onto an empty hallway.

For the past years, I have not been able to enjoy Halloween, partly because I had to work and  living in a vacation town where half of the houses around us stood empty most of the time for being vacation homes.  There is no trick or treating here. very sad.

This pair of socks hopefully will bring me some of the fun of Halloween. 
 I wrote down the patterns and put the charts up.

Getting ready for the Halloween


Yarn: Cascade Heritage Color 5601 (Black), 5646 (Orange)
Needles: US #2 (I used 2 circulars)
Gauge: 36 sts x 40 rows = 4"x4" in colorwork and knit in round. 

Use Black yarn and CO 72 sts and dvided them among 2 circular needles (36 sts on each Needle.)
Work 9 rounds of Chart A for cuff.
  • Round 1, 2, 8 & 9:  use only black, (k2, p1) repeat to end
  • Round 3-7:  (k2 in orange, p1 in black)

Leg:
  • For right leg work chart B and begin at the indicated st (lower right corner,) finish all 36 sts of chart on first needle, and repeat on second needle. Work all 40 rows.
  • For right leg work chart C and begin at the indicated st (lower right corner,) finish all 36 sts of chart on first needle, and repeat on second needle. Work all 40 rows.
 Heel:
  • Work only with the 36 sts on first needle and work back and forth. 
  • Begin Chart D for heel and work total 17 rows, end with RS row.

Heel Turn:
  • Work only with black yarn and only the sts on the first needle.
  1. Row 1 (WS):  sl 1, p20, p2tog, p1, turn.
  2. Row 2 (RS):  sl 1,  k7, ssk, k1, turn.
  3. Row 3 (WS):  sl 1, p to 1 st before gap, p2tog, p1, turn.
  4. Row 4 (RS):  sl 1, k to 1 st before gap, ssk, k1, turn.
  • Repeat row 3 and 4 until all sts are worked, end with RS row (22 sts remained.)

Gausset and Foot:
  • Pick U 13 sts on either side of the Heel Flap on the same needle as heel flap (first needle) - total 48 sts. 
  • To indicate the beginning of the round, place a marker between the last st on heel turn and the first pick up st on the left of the heel as you're looking at it. (Note that the beginning of the round begins on the 36th st of the first needle.)
  1. Round 1:  Begin as indicated on Chart E for foot, work to the end of round.
  2. Round 2:  Work in est patt to last 3 sts on first needle (that holds the heel and the pick up sts), k2 tog in black, k1 in orange, continue in est patt 'till the end of second needle.  For the first 3 sts on the first needle, k1 in orange, ssk in black, work in est patt 'till the marker (end of round.)
  3. Round 3:  Work even in est patt (k all black sts from previous round black, and all orange sts orange.)
  • Repeat round 2 and 3 until 72 sts remained (36 sts on each needle.)
  • Work only round 3 until 2" from the tip of toes.

Toes:
  • Work only with black yarn.
  1. Round 1:  k all sts
  2. Round 2:  k1, ssk, k to last 3 sts of the first needle, k2tog, k1, k1, ssk, k to last 3 sts of the second needle, k2tog, k1.
  • Rep last 2 rounds 4 more times (52 sts)
  • Rep only round 2 until 10 sts remained.

Finish:
  • Cut Yarn and leave a 12" tail.
  • Graft sts together using Kirchner sts.
  • Weave in ends.
  • Block.


Wednesday, August 25, 2010

Trip To The Coast

Only a week before I have to return to work, and this summer I really didn't get a chance to get away, so we decided to drive to the coast for coupla days.

Paul could only get one extra day off, so we were were at the coast for two days only. The drive out there was 7-8 hours each way, but it was so worth it. Walking along the beach and hanging out by the ocean was exactly what I needed. I just felt so much calmer and happier afterward.

Sunday night we drove out to Willit. Early next morning we drove for an hour and got to Mendocino. We were very glad not pushing the last leg in the dark of night because the road was nothing but twists and turns going uphill and downhill the entire way in the dense woods with no streetlight.

When we got to Mendocino, we bought some sandwiches in town and hung out at the beach for the afternoon. We found a semi-private little beach with a cave behind us that drips water. It was simply beautiful. The sun was shining, warm with very light ocean breeze. We couldn't ask for a better day. This was the good life.

Around sunset, we went to dinner at Raven, a vegan restaurant. We got to sit right by the window with an ocean view. The food was really wonderful.

That night we stayed at Fort Bragg. It is only 10 minutes north of Mendocino, a more real town with cheaper motels. While Medocino was nice, but it was too touristic and too quaint for our taste, not to mention out of our budget.

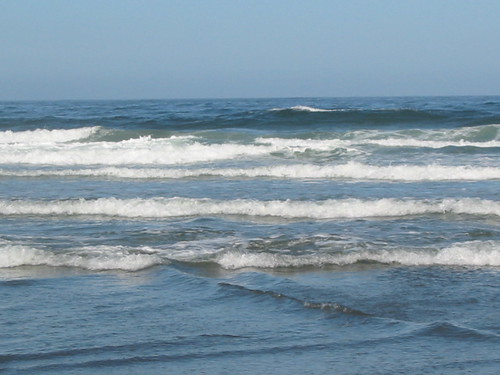
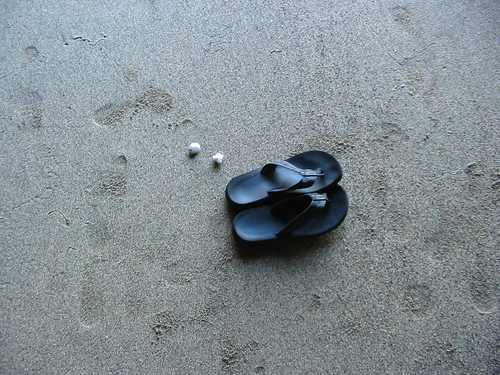
Tuesday morning we drove up north and found a lovely, nearly deserted beach with only a few dog walkers (pictures below) and walked along the beach for a long time before we headed back home.

It was a trip for our souls.